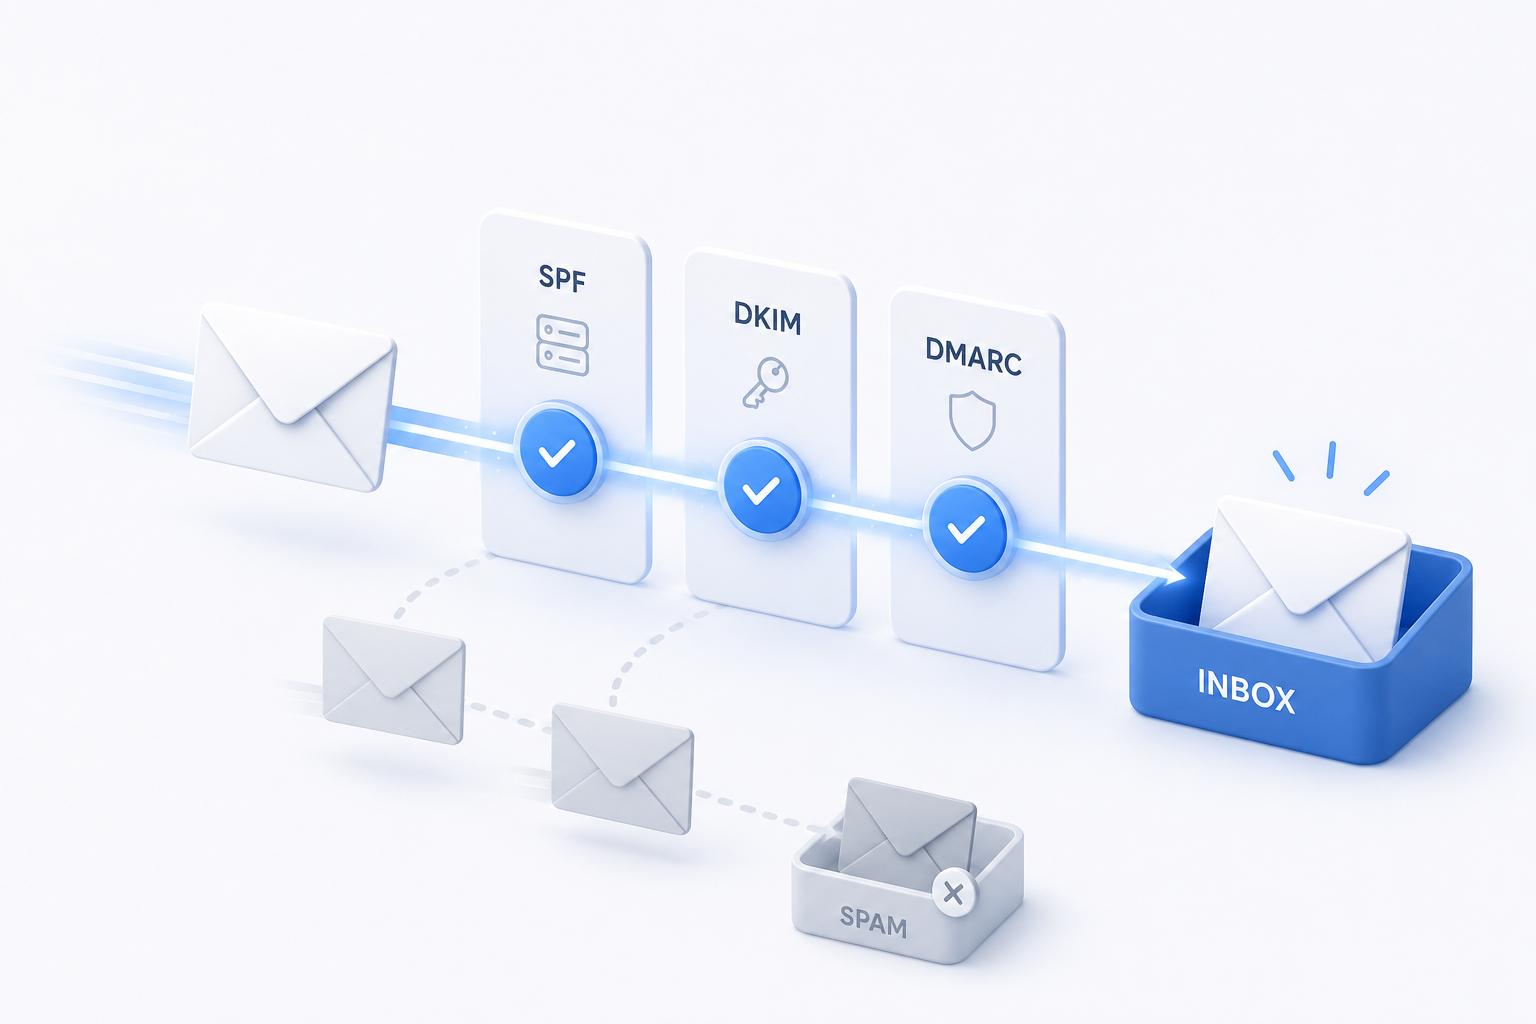
A plain-English guide for anyone who sends email from their own domain.
Why this matters
You write an email, hit send, and assume it lands in your customer’s inbox. A lot of the time, it doesn’t. It quietly slides into the spam folder, or it never arrives at all. You never find out, and you lose the reply, the booking, or the deal.
Here is the part most people don’t realize: the inbox providers (Gmail, Yahoo, Outlook, and the rest) decide where your email goes, and they make that decision based on trust. Before they show your message to someone, they ask one quiet question behind the scenes: can we actually confirm this email is really from who it says it’s from?
If the answer is no, they get cautious. Cautious means the spam folder. Sometimes it means rejecting the email entirely.
DMARC is how you give them a clear “yes.” It’s one small setting you add to your domain that tells every inbox provider in the world, “Emails from me are verified. You can trust them.” Once that trust is established, your real emails are far more likely to reach the inbox where people will actually see them.
This guide walks you through what DMARC is, how to set it up, and what every part of it means. No technical background needed.
What DMARC actually is
DMARC stands for Domain-based Message Authentication, Reporting, and Conformance. That’s a mouthful, and you can forget the full name immediately. Here’s what it does in one sentence:
DMARC is a short instruction you publish for your domain that tells inbox providers how to confirm your emails are genuinely yours, so they feel safe delivering them.
To understand why this is necessary, it helps to know one uncomfortable fact about email: by default, anyone can put any name in the “From” line. Email was built in a more trusting era, and it never came with a built-in way to check who really sent a message.
Think of a paper letter. You can write anyone’s name and address as the return address in the top-left corner, drop it in the mailbox, and the postal system will carry it without ever checking whether that return address is true. Email works the same way. Someone can send a message that says it’s “from” your business, and nothing about plain email stops them.
Inbox providers know this. So when an email shows up claiming to be from your domain, they can’t just take its word for it. They look for proof. DMARC is the system that lets you provide that proof and tell them what to do when proof is missing. When you have it set up correctly, the providers can confirm your mail is real, trust builds up around your domain over time, and your emails earn their place in the inbox.
How this connects to your deliverability
It’s worth being clear about the chain of cause and effect, because this is the whole reason DMARC is worth your time:
- Inbox providers reward senders they can verify. A domain whose mail is consistently authenticated looks legitimate and trustworthy. A domain whose mail can’t be verified looks risky.
- Trust is built on your sending reputation. Every domain has a reputation with the big providers, a bit like a credit score for email. Good reputation means inbox. Poor reputation means spam.
- Unverified and faked email quietly destroys that reputation. If scammers send junk while pretending to be your domain, those messages get marked as spam by recipients, and the damage lands on your reputation. Your own legitimate emails then start struggling to get delivered, through no fault of your own.
DMARC protects all three. It lets providers verify you, it strengthens your reputation, and it shuts down the fakers who would otherwise drag your reputation down. The end result is the thing you actually want: more of your emails reaching the inbox.
There’s also a hard requirement now, not just a nice-to-have. As of early 2024, Gmail and Yahoo began requiring senders to have DMARC in place, and Microsoft Outlook followed in 2025. If you send a meaningful volume of email and you don’t have it set up, your messages can be sent straight to spam or refused outright. DMARC has gone from “good idea” to “the cost of entry” for reliable delivery.
The shortcut The rest of this guide explains how DMARC works and how to set it up yourself, which is genuinely worth understanding. But you don’t have to do the fiddly parts by hand. Sendable generates your records copy-paste ready, shows you exactly where to paste them, and collects your reports for you automatically so you never have to open a raw file or decode anything. Watch for the With Sendable notes below to see where it saves you the work.
A few terms you’ll see (kept short)
You don’t need to become technical, but four words will come up during setup. Here’s just enough to make the steps make sense.
- Domain. This is your address on the internet. It’s the part after the @ in your email and the heart of your website address, like
yourbusiness.com. You bought it from a company such as GoDaddy, Namecheap, or Wix. - DNS. Think of DNS as the phonebook of the internet. It connects easy-to-read names (
yourbusiness.com) to the computers that actually run things behind the scenes. It also stores small public notes about your domain, and your email settings live there. - DNS record. This is a single entry in that phonebook. There are different types for different jobs.
- TXT record. This is the “notes” type of entry, a place to store a short piece of text. Your DMARC setting is published as a TXT record. So when this guide says “add a TXT record,” it just means “add a small text note to your domain’s settings.”
That’s it. With those four words, every step below will read clearly.
Before you start: SPF and DKIM
DMARC doesn’t work entirely on its own. It relies on two companions that need to be in place first, called SPF and DKIM. In plain terms:
- SPF is the list of services allowed to send email on your behalf.
- DKIM is a tamper-proof seal added to each email that proves it really came from you and wasn’t altered along the way.
DMARC is the decision-maker that sits on top of these two. It checks whether SPF and DKIM line up with the address your recipient actually sees, and then it tells the inbox provider what to do. Without SPF and DKIM, DMARC has nothing to check, so it can’t help you. Set those two up first, give them about 48 hours to settle, and then come back to DMARC.
With Sendable SPF is one of the things Sendable hands you ready to paste, so you don’t have to build it by hand. DKIM is the one piece that lives with your email provider (your ESP), because that part is generated on their side and can’t be automated from outside. Sendable points you to the right place for it.
Setting up SPF and DKIM is covered in its own guide. The SPF and DKIM setup guide is coming soon.
How to set up DMARC, step by step
You don’t write the DMARC record yourself. Sendable generates it for you, already filled in and free of typos, and tells you exactly what to paste and where. Your job is just to drop it into your domain’s settings. These steps work no matter who hosts your domain, and the wording in your dashboard might differ slightly, which we cover right after.
Step 1. Make sure SPF and DKIM are already set up and have been active for at least a couple of days. Sendable hands you your SPF record ready to paste, and points you to your email provider for DKIM.
Step 2. Open your record in Sendable. Sendable shows you your finished DMARC record, ready to copy. It already includes your personal reports address, so reports come straight back to you. You don’t have to type or assemble anything.
Step 3. Log in to wherever you manage your domain. This is usually the company you bought the domain from (GoDaddy, Namecheap, and so on), but it can also be a separate service like Cloudflare, or your website builder like Wix or Squarespace. Look for a menu called DNS, DNS Management, Advanced DNS, Manage DNS, or DNS Records.
Step 4. Add a new record, and choose TXT as the type.
Step 5. Fill in the two fields with the values Sendable gives you. In the “Host” or “Name” field you’ll enter _dmarc, and in the “Value” or “Content” field you’ll paste the record Sendable generated. Sendable shows you both values side by side so you can copy each one across. A first record looks like this: v=DMARC1; p=none; rua=mailto:yourtoken@ag.sndbl.com
You don’t need to understand or build that line. Sendable produces it for you, and the next section explains what each part means so you know what you’re looking at.
Step 6. Leave TTL on its default (or set it to one hour / 3600 if asked). TTL just controls how often the internet checks for updates, and the default is fine.
Step 7. Save.
Step 8. Wait, then verify. Changes usually appear within minutes but can take up to a day to spread everywhere. Then check that it worked (covered further down).
One thing worth knowing: you set DMARC up in your domain’s DNS settings, not inside Gmail or Outlook. Those services send your mail, but the DMARC note lives with your domain.
With Sendable The only manual part left is pasting two values into your domain. Everything that’s easy to get wrong, the record itself, the exact syntax, the reports address, is done for you. Sendable gives you a personal reports address that looks like
yourtoken@ag.sndbl.com(the token is unique to your account), builds it right into your record, and walks you through where to paste everything for your specific provider.
What goes in the record, explained
You don’t have to build this yourself, Sendable generates the whole line for you. But it helps to understand what Sendable produced, so here’s what each part means. A DMARC record is just a single line made of small tag=value pairs separated by semicolons.
v=DMARC1: The label that marks this as a DMARC record. It always comes first and is always written exactly like this. (Sendable sets this.)p=: The policy, meaning what providers should do with email that fails the check. The three options arenone(just watch, change nothing),quarantine(send suspicious mail to spam), andreject(block it outright). (You choose the stage; Sendable writes it in.)rua=: The address where the summary reports are sent. Sendable points this at your personal reports address so the reports come back to your dashboard automatically. (Sendable sets this.)sp=: A separate policy for your subdomains (likemail.yourbusiness.com), if you ever want one. (Optional; Sendable handles it if needed.)adkim=andaspf=: How strictly the checks must match. The relaxed default is right for almost everyone, so these are usually left out. (Optional; Sendable handles them if needed.)
You may see older guides mention tags like pct, ri, or ruf. You can safely ignore them. The DMARC standard was updated in 2026 and those are no longer recommended, so Sendable doesn’t use them. Your record stays clean and modern.
Here are the three records Sendable generates for you as you progress, from safest to strongest. You don’t write these, you just pick which stage you’re ready for and Sendable produces the matching record:
- Monitoring only (start here):
v=DMARC1; p=none; rua=mailto:yourtoken@ag.sndbl.com - Send fakes to spam:
v=DMARC1; p=quarantine; rua=mailto:yourtoken@ag.sndbl.com - Block fakes entirely (the goal):
v=DMARC1; p=reject; rua=mailto:yourtoken@ag.sndbl.com
The safe way to turn it on: go slow
This is the most important advice in the whole guide, so don’t skip it.
It’s tempting to set DMARC to its strongest setting right away and feel fully protected. Don’t. If your setup isn’t perfectly complete, the strongest setting will start blocking your own legitimate emails, which is the exact opposite of what you want. The cure becomes worse than the disease.
Instead, climb the three steps gradually:
- Start at
p=none(monitoring). Nothing gets blocked. You’re simply watching and collecting reports about who is sending email as your domain. Stay here until you’re confident all your real email is passing cleanly, which usually takes a few weeks of watching. - Move to
p=quarantine. Now anything that fails the check gets sent to the spam folder rather than the inbox. This is a safety net, not a hard wall, so any legitimate mail that slips through is recoverable while you fine-tune. - Finish at
p=reject. Failing email is now blocked completely. This is full protection and the goal you’re aiming for. It’s also what unlocks advanced perks down the road, like showing your verified logo next to your emails.
The logic is simple: monitoring first lets you discover every legitimate service that sends email for you (your CRM, your booking tool, your newsletter platform, things you may have forgotten about) and confirm they all pass before you start blocking anything. Going slow is how you get full protection without ever accidentally blocking yourself.
With Sendable The hard part of going slow is knowing when it’s safe to move up. Since Sendable is already reading your reports, you can see at a glance when your legitimate mail is passing cleanly across the board, which is your green light to step from
nonetoquarantine, and later toreject. You’re moving up on evidence instead of guessing.
Where your provider might differ
The steps above are universal, but the single most common stumbling point is the “Host” or “Name” field. Some providers automatically add your domain for you, and others don’t. Here’s the quick lay of the land for the most common ones.
- GoDaddy: My Products > Domain > DNS. Host:
_dmarc(it adds your domain automatically). - Namecheap: Domain List > Manage > Advanced DNS. Host:
_dmarconly. - Cloudflare: DNS > Records. Host:
_dmarc(no domain, no trailing dot). - Squarespace: Domain Settings > Custom Records. Host:
_dmarc(it adds your domain automatically). - Wix: Domain settings > DNS Records. Host:
_dmarcexactly (not blank, not@). - Bluehost / HostGator: DNS Zone Editor. Host:
_dmarc(some versions want the full_dmarc.yourbusiness.com).
The simple rule to remember: type _dmarc first. If the dashboard shows you a preview like _dmarc.yourbusiness.com, you got it right. If after saving you see the domain repeated twice, like _dmarc.yourbusiness.com.yourbusiness.com, you added too much. Delete it and re-enter just _dmarc.
One important catch: your DMARC record has to be added wherever your domain’s settings actually live, which isn’t always the company you bought the domain from. If you use Cloudflare or your website builder to manage your domain, that’s where the record goes, not the original registrar. If you’re unsure, the verification step below will tell you immediately whether it landed in the right place.
With Sendable This is the field people get wrong most, so Sendable spells it out for your specific provider. It tells you the exact value to put in the Host field, whether your provider adds the domain for you or not, and flags the doubled-domain mistake before it happens. You’re never guessing what to type.
How to check it worked
After you save, you’ll want to confirm the record is live and correct. Sendable checks this for you, so once you’ve pasted the record you can simply let it confirm the record is published and reading correctly. (If you ever want to look yourself, a free online “DMARC checker” will also show your live record, but with Sendable you don’t need to.)
Give it some time either way. Most changes show up within a few minutes, but they can take up to 24 to 48 hours to fully spread across the internet, so don’t panic if it isn’t instant.
Once your record is live and you included the reports address (rua=), you’ll start receiving summary reports within a day or two. These arrive as files that look a little cryptic on their own, because they’re built for machines to read. They list every service sending email as your domain and whether each one passed the check. Most people use a reporting tool to turn these into a simple, readable dashboard rather than reading the raw files. These reports are your eyes during the monitoring stage, and they’re how you’ll know when it’s safe to move up to the next policy.
With Sendable This is the part Sendable removes entirely. Because your reports point to your personal Sendable address, they never land in your inbox as raw files. They flow straight into Sendable, which turns them into a plain-English dashboard you can actually read: who is sending as you, what’s passing, and what isn’t. It also watches things for you and alerts you when something breaks, so you don’t have to remember to check.
Common mistakes to avoid
A short checklist of the traps that catch most people:
- Jumping straight to
rejectorquarantine. This is the number one mistake. Always start atnoneand climb gradually. - Skipping SPF and DKIM. Without them, DMARC has nothing to verify and will fail your real mail. Set them up first.
- Getting the Host field wrong. Forgetting the underscore in
_dmarc, typing@or your bare domain instead, or accidentally doubling the domain. - Adding two DMARC records. Only one is allowed. If your provider already created one (some do automatically), edit that one rather than adding a second. Two records cancel each other out.
- Small typos. Misspelling
quarantine, using commas instead of semicolons between tags, or forgetting themailto:in front of your reports address. The record has to be exact. - Editing DNS in the wrong place. If your domain is managed somewhere other than where you bought it, the record won’t take effect unless it’s added in the right spot.
- Setting it and forgetting it. If you add a new email tool later, it may need to be accounted for. It’s worth a quick review now and then.
- Staying on
noneforever. Monitoring is the starting line, not the finish. It gives you visibility but no real protection. The goal is to reachrejectonce you’re confident.
In short
DMARC is one small text setting that has an outsized effect on whether your emails actually reach people. It works by letting inbox providers verify that your mail is genuinely yours, which builds the trust that earns you a place in the inbox instead of the spam folder. Set up SPF and DKIM first, publish your DMARC record starting in monitoring mode, watch the reports, and climb steadily toward full protection. Done right, the payoff is simple and worth it: more of your emails landing where they’re meant to be.
The Sendable difference Everything in this guide can be done by hand. Sendable just removes the parts where people get stuck. Your SPF and DMARC records come ready to copy and paste, your reports collect themselves through your personal Sendable address instead of piling up as unreadable files, and a clear dashboard plus alerts tell you what’s working and when it’s safe to tighten your protection. You get the inbox results without the technical headache.
When you’re ready, create your account.